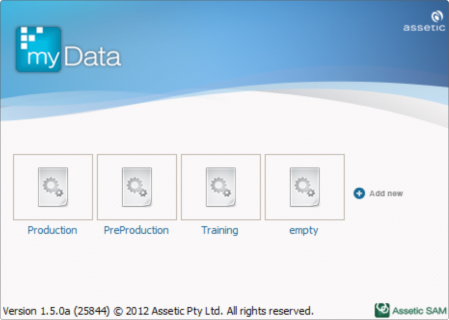
Deployment Configuration - Global Configuration File Example
Outcomes: Gain an understanding of how to manage Global Configuration Files.
The Admin Utility is used by system administrators to maintain Global Configuration Files and also install database structures for myData.
The administrator should setup one configuration file for each environment (e.g. Testing, Production. See: Recommended naming of myData databases).
- Open up Windows start menu and select Assetic SAM.
- Open up myData Admin Utility (or myValuer Admin Utility).

- After the Admin Utility is launched, click Next.
- Under the Global Configuration Path box, click New...
- Type in the intended path for the configuration file (e.g. "S:\MyData\Production.config").

- Click the Open Configuration Page button to configure the details settings that are required to run myData application.
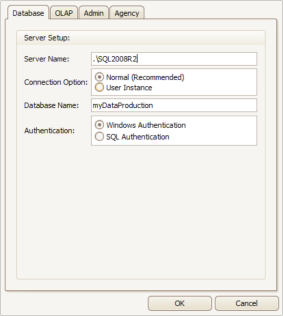
The Database tab contains the settings for SQL Database.
Assetic myData stores its data in the database that is specified in this tab.
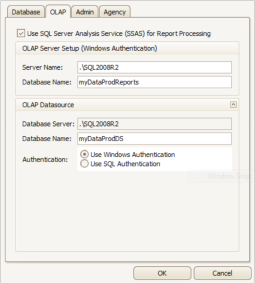
The OLAP tab contains additional settings for connecting to SQL Server Analysis Service (SSAS) See: Additional Guidelines for SSAS setup.
This option can greatly improve Financial Report performance when the system has more than 6000 records.
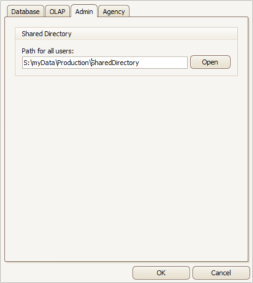
The Admin tab contains the setting for Shared Directory.
This network location is used to store globally shared configuration and files.
ll Users should have full access to this network location.
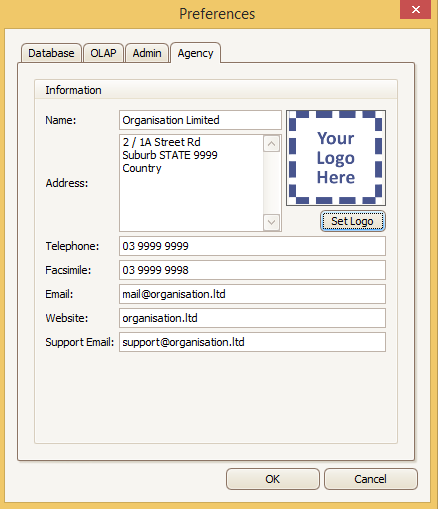
- The Agency tab allows you to
- Enter information about your organisation
- Brand the application your corporate logo
- Set a custom Support Email address for support requests
This allows organisations to internally triage support requests before they are escalated to Assetic support.
There are three scenarios that generate support emails- User clicks Help - Send Feedback
- User clicks Help - Report Issue
- Pop up error when performing a task
- The default Support Email address (when the field is left blank) is 'support@assetic.com'
- Click OK to save the global configuration and click the Next button.
- Click Install/Upgrade to create all necessary table structures in the database.
Type in the default user name (Admin) and password (Admin).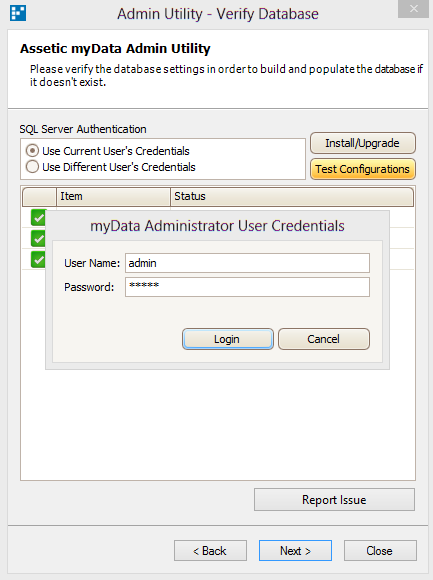
- Once database installation is completed, click Next to apply license to database.
- Enter the licence key and click on Activate button to load the license file that is supplied by Assetic.
It is important that the current User Domain matches with the User Domain in the license files.
User has the choice to upload a licence file.
Click "Close" to finish the configuration step.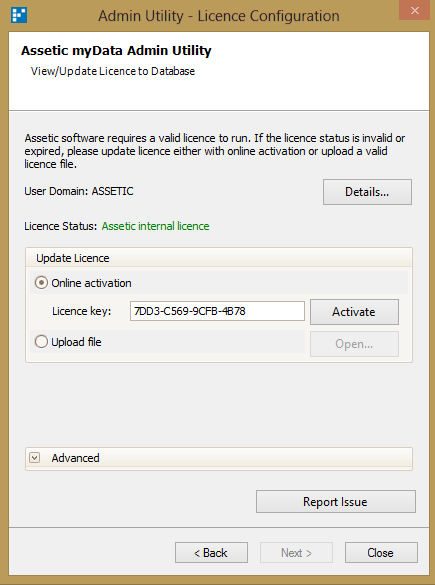
- Launch myData from the Desktop, and when it prompts for the Global Configuration file, use the Configuration file that was created in step 5.